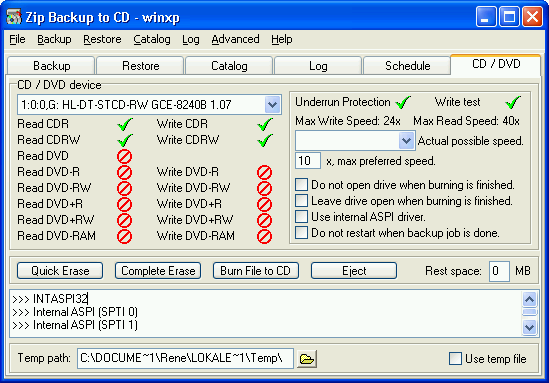
Zip Backup to CD screenshots
Backup

To open an existing backup job select: files/open backup job.
To create a new backup job mark
all selected folders in the folder list and select: Backup/Remove folder. Now you
are ready to add the folders to backup select: Backup/Add folder to backup.
Continue with adding all the folders which you want to backup.
Decide if all files in the selected folders shall be backed up or only the files which have been changed since the
last backup where the archive bit were cleared shall be backed up.
Check the field clear archive bit to get the archive bit of the backed up files cleared after they are
backed up. This makes it possible afterwards to make backup of only the files changed
since the last full backup.
In addition to above selection you
also have the option to backup files which have been changed after a specific date and
time by checking the field Newer than and submitting a date and time.
A special feature is the possibility to use automatically the date and time for the last execution of a backup job
as the newer than date and time. The feature is enabled or disabled with the menu Backup/Use
Last runtime as newer than. This feature is especially useful if you want to make
backup copies in very short intervals to have the possibility of saveing the different
stages of a project.
The Zip file created will normally
get a name in this format 000627100ak.zip according to the date and followed by a number
starting with 100 for the first file created this day. After the number may follow an
"a" which means that only files with the archive attributes set (files changed
since last backup) have been backed up or a "c" which means that it is a copy
and the archive attributes have not been cleared after the backup of the files. You can
also specify a name which shall precede the creating number. Now it should be decided
where the backup files shall be stored. It is recommended to store the file on a fixed
disk drive before copying it to a CD-R. The Zip file size can be specified by selecting
one of the fixed sizes or by specifying your own size. When the Zip file has achieved the
selected size, the program will continue to create the next file if there is enough free
space on the destination drive. If there is not enough free space, the program will stop
the zipping process and allow the user to insert a new removable media or copy the created
file to a CD-R and thereafter delete the file to make free space. Now the user shall press
OK and the zipping process will continue to create the next Zip file.
The compression factor can be
selected by the user. Selecting compression factor over middle will slow down the zipping
process and should only be used if the Zip file size is of great importance.
Restore

To start the restoring process of
one or more files start with opening the Zip file containing the files by selecting the
menu Restore/Open file to restore from. You may also use any other Zip program to
unzip the files from the Zip file.
Select the folder, drive or
network share where the files shall be restored to. Check the field Add stored path to
destination path to get the restored files placed in the same folders as the original
one, from which it was backed up. Unchecking this field will restore all files in the
destination path regardless of their original path.
Decide if the files restored shall
overwrite existing files and when the files shall be overwritten.
Mark the files which shall be
restored and press start to begin the restoring.
It is possible to change the sort
order of the file list by double clicking the column header.
Log

The log shows information on
backup jobs processed. To read in the last information press the Update button. The
information is stored in a standard text file ZipBackup.Log.
Schedule

Here it is possible to schedule
the opened backup to run at different times. To schedule another job open the job as
described under backup.
Monthly:
The job scheduled will run monthly
on the first occurrence of the days checked, e.g. First Monday in the month or the first
day in the month if a date is specified.
Weekly:
The job scheduled will run weekly
on the first occurrence of the days checked.
Daily:
The job scheduled will run daily.
Once:
The job will only run once.
When the date and time for the job
to schedule has been selected, press the Add button to add the job to the schedule
list.
Remove a job by selecting the job
in the lower list and press the Remove button.
The upper list contains the job
with name and time to be run next. The lower list contains the schedules as added.
Zip Backup to CD can be started
automatically every time when the computer is started by checking the menu Files/Start
automatic
CD/DVD

| 
